It has been a VERY long time since I have posted anything here but we have been understandable busy. As you know, we slept here in our new house for the very first time the Thursday before Good Friday, just before Easter, which was March 28. That means we have been in the house for just over 4 months. Which is very hard to believe since time has flown by so quickly. But we absolutely LOVE being here.
In that time, we have tried to keep working away at the large list of unfinished projects. But other things in life keep coming up and put DIY projects on hold. First, we had to sell our town house which meant we had to pack everything up and move it out, clean the whole thing and get the main floor repainted. That was a lot of work! But once we held our one and only open house (we sold privately), we had an offer, which we accepted, the next day. So, the process of selling the house went super fast. Cleaning it all out was another story.
Once the house was sold, it was time for me to catch up on all the 2012 paperwork for the farm that I didn't do while building our home. So, that meant everything from April-December of 2012 needed to be entered into the computer, reconciled, etc. and handed in to the accountant so she could have it filed before June 30, which is tax deadline. We made it but not with many days to spare.
Once the paperwork was done, I had 4 flower girl dresses to sew for my niece's wedding, which was mid-July. That took a bit of time but it was sure fun to pull out the sewing machine again. That is, once I found all my sewing supplies, which were still packed in boxes in various parts of the house.
That bring us to about now. In between gardening and canning, I am currently working on the school room. That is the room at the top of the priority list since I hope to start schooling again at the end of this month or the very beginning of September. I have already installed all the cabinetry and am currently working on making the desktops. More on that on another post on another day sometime in the future. For today, I wanted to show you the kitchen. My kitchen designer kept bugging me for photos for her portfolio so I took some time last month to take some photos and thought I would share them with you. This room, this kitchen, is a dream-come-true kitchen for me and it has already been very well-used. We have hosted a bridal shower, Mother's Day and Father's Day gatherings, baked many batches of cookies and buns, canned many, many jars of jam and made amazing meals for friends and family. It is a wonderful place to be and I am not sure I would change one.single.thing.
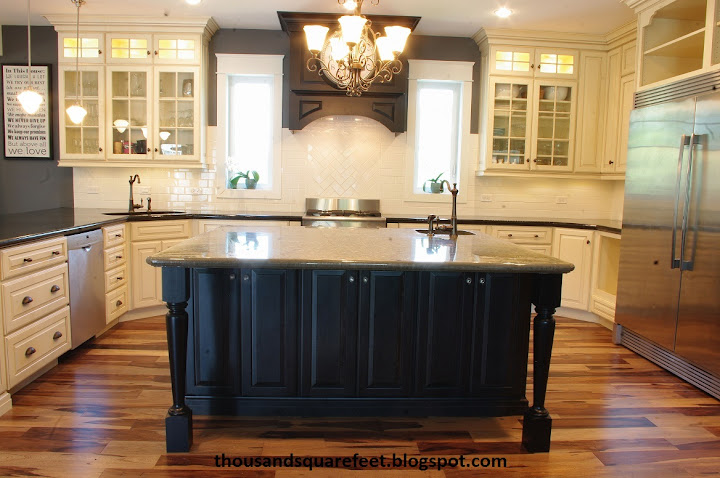
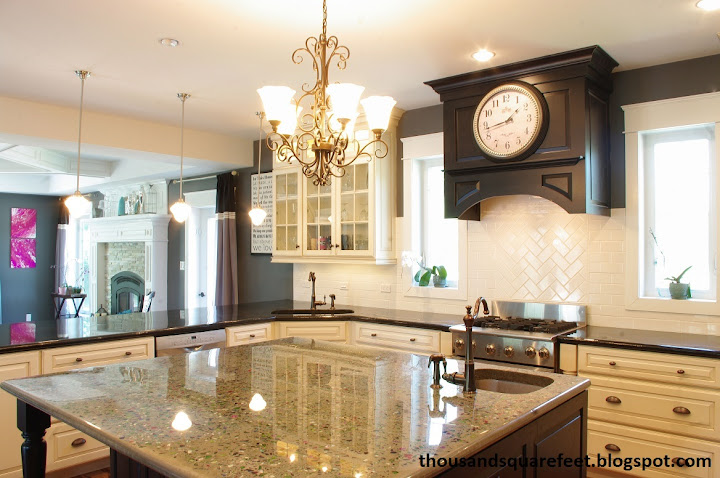
Without further ado, here is our kitchen. Truly, it is the heart of our home.
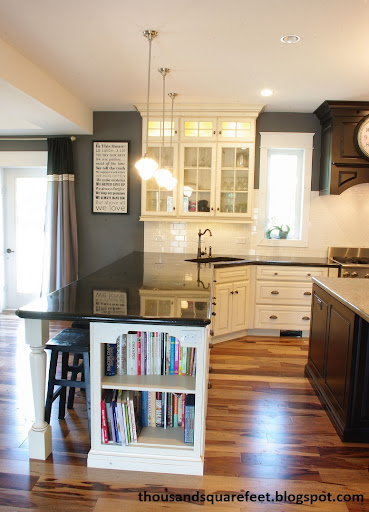
When you look at this kitchen, you may not realize how many things we did ourselves. First of all, I designed this kitchen long before we even started building the house. As a matter of fact, we ordered the kitchen before we even had a hole in the ground. I may have had a kitchen designer but I knew exactly what I wanted and just told her where to put things.
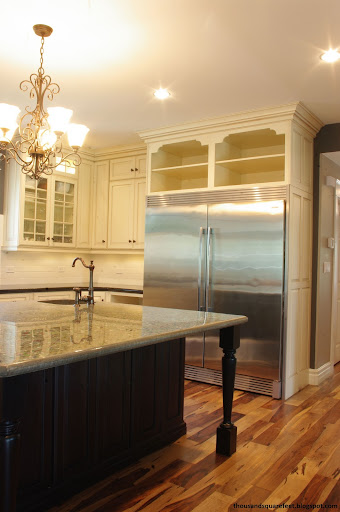
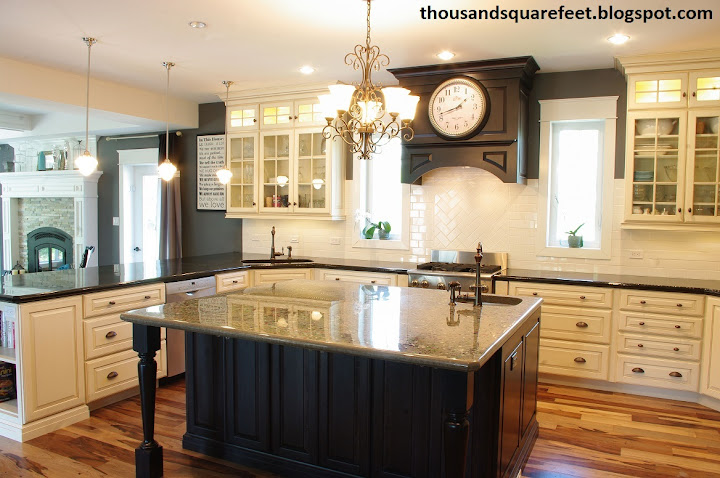
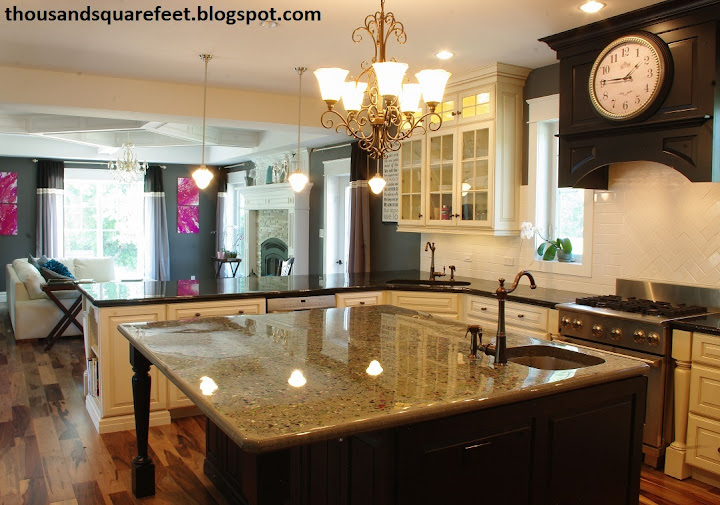
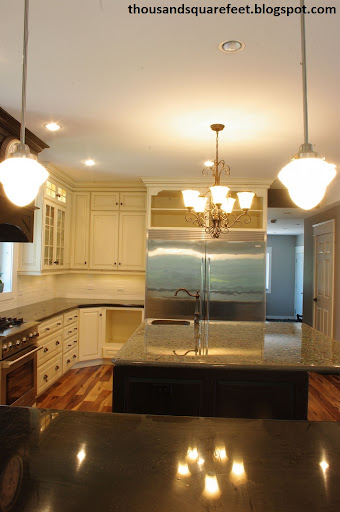
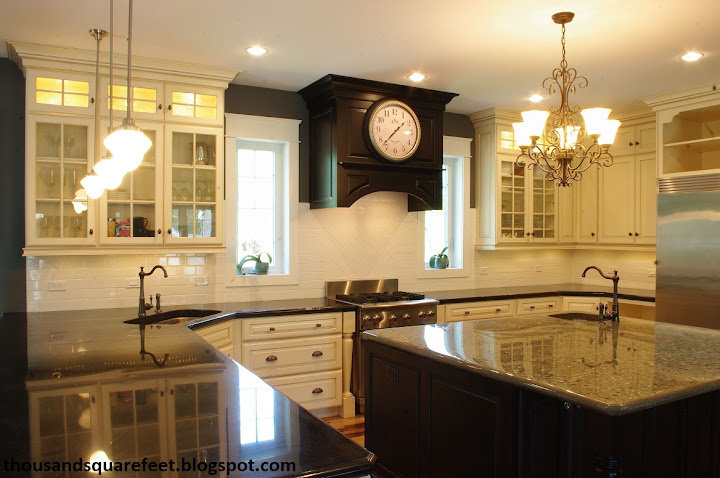
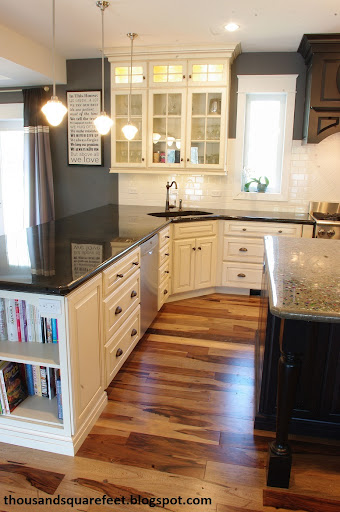
This is the kitchen I dreamed about after looking at many, many kitchen books and magazines. The upper cabinets with glass doors? Check! Lighting in the very upper cabinets? Check! Painted and glazed cabinetry? Check! White subway tile backsplash? Check! Pullout spice racks beside the stove disguised behind pillars? Check! A large mantle-looking exhaust cover? Check! Bookshelves for cookbooks? Check! Pillars supporting both the overhanging peninsula counter and island counter? Check! Places at the counter for all of us to sit? Check! Garbage pullouts in the kitchen? Check! Loads of storage? Check, check, check! This kitchen is loaded with everything I wanted.
Then, after building the house, we installed the kitchen cabinets ourselves, along with Mr.W. Once the cabinets were in place, we made the concrete countertops. Yup, all the counters in the kitchen are concrete and they are unbelievably beautiful! They are easy to work on, easy to clean, and rolling out dough on them is so nice thanks to their super-smooth-and-shiny surface. After the counters were done, I tiled the whole backsplash and installed the under cabinet lighting while hubby installed our Brazilian pecan floors. Once those were done, I installed all the knobs/pulls on the cupboards and the toe kick at the bottom. I plumbed and installed the dishwasher and put together the fridge/freezer surround. Nevermind that I wired and hung all the lights, painted the walls and built and installed all the mouldings around the windows. This may look like your normal, ordinary, everyday kitchen but to me it is a labor of love, sweat and maybe, just maybe, a few tears.
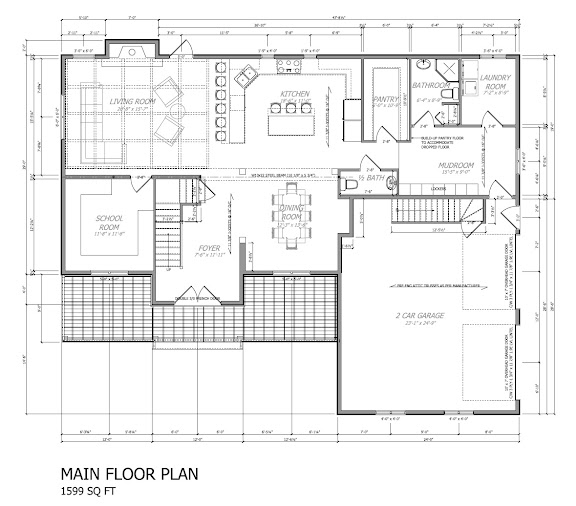
You may be wondering, is my kitchen always this clean? Absolutely not! Our kitchen is very lived in, well used, and often holds 7 people working in it. But, I do like to have counters that aren't cluttered. As of yet, I haven't found the perfect decorating pieces for the counters so they are empty . . . for now. As things change, I will be sure to keep you informed. But I hope you enjoyed today's tour anyway. Hopefully, I can show you more rooms in the house soon as they are finished up and I promise to include a full floor-plan as well so you can see how each room interacts with the next.
Sources:
Cabinetry -
Medallion Cabinetry, Brookhill Style, maple wood; the island and range hood are in the Onyx stain and the rest of the cabinets are painted Morel with a Burnt Sienna glaze
(ordered through McDiarmid Design Center)
Backsplash Tile - white 3"x6" subway tile (purchased at Menards)
Countertops - DIY
Windows -
Durabuilt (ordered through their Winnipeg office)